Valto — Keep ahead of tomorrow

News

Everything You Need To Know About Creating A Dropdown In Power Apps

Discover how to create dropdowns in Power Apps, customise properties, and integrate with data sources like SharePoint in this easy-to-follow guide.

PowerApps
Published
20 January 2025

Everything You Need To Know About Creating A Dropdown In Power Apps

Dropdowns in Power Apps are a simple yet effective way to offer users a selection from a predefined list, saving space and ensuring consistency.

In this blog, we’ll cover the basics of creating a dropdown, working with data sources like SharePoint, and customising properties.

Whether you’re new to Power Apps or refining your skills, this guide will walk you through everything you need to know to get started.

What is a dropdown?

A dropdown is an input control that can be used to contain a list of options for a user to select from. They are great for condensing screen space whilst restricting the input options to a pre-determined set of choices.

Microsoft defines it as “A list that shows only the first item unless the user opens it”.

Key Features

Default – The value of the dropdown unless it is changed.

Items – The data source. If the data source has multiple columns, you will need to set the Value property as well to specify the column

AllowEmptySelection – Does what is says on the tin. Allows the user to choose a blank value if set to true and forces the user to pick an option if it is false.

Why would I use a dropdown?

A dropdown’s primary use is granting the user the ability to input data from a predefined list of options. They are excellent for interacting with choice columns in a database.


How to create a dropdown

Whilst you can do this without connecting to a data source, the chances are that you will be connecting to a data source.

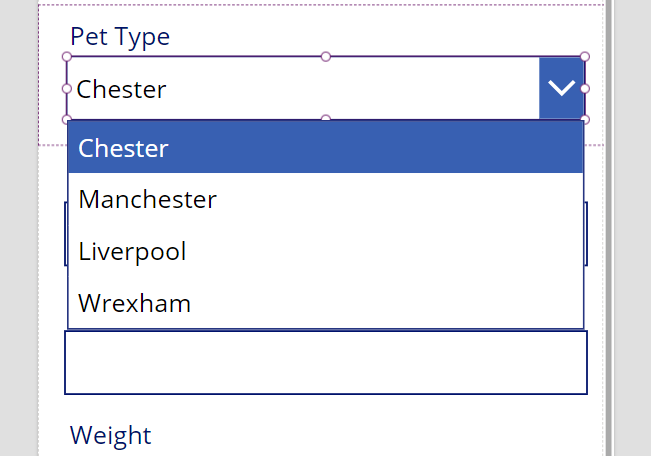
To use one without a data source, you can add this expression to the dropdown’s Items property:

[“Chester”, “Manchester”, “Liverpool”, “Wrexham”]

This example will follow with a data source – namely SharePoint Using the previously created list – Pet_data and app template.

power apps drop down error

First dropdown pre-requisites

You will need a data source to connect to In this example, I will be using SharePoint with some sample data, but you can use any that you have. If you wish to follow this example download the pet_data.xlsx csv file In your SharePoint site select New > List Select “from CSV” On the import screen select “Title” for the pet's name and click next Click create on the confirmation popup This will then import the list and make it available to you https://.sharepoint.com/sites//Lists/pet_data/

  • In this example, I will be using SharePoint with some sample data, but you can use any that you have.
  • download the pet_data.xlsx csv file
  • In your SharePoint site select New > List
  • Select “from CSV”
  • On the import screen select “Title” for the pet's name and click next

Step 1 – Setting up a choice column

  • Head over to SharePoint where you previously created the Pet_data list.
  • Select the “Pet Type” column -> Column settings -> Edit
  • Change the Type to Choice
  • In the new “Choices” section, add in Dog, Cat, and Hamster
  • Hit save
  • Step 2

  • Open the app you previously created and select the data tab on the right-hand side of the screen
  • Right click pet_data and hit refresh
  • power app dropdown

    Step 3

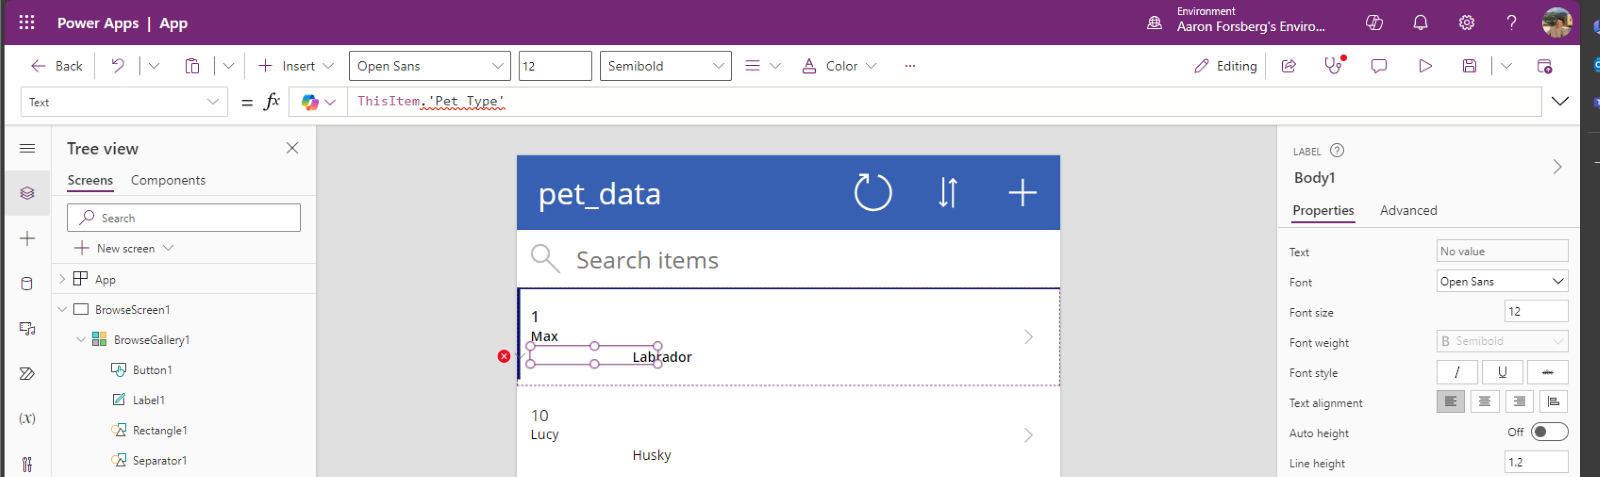
    Now you should come across a few errors, as to be expected when changing a data type. The first error we will tackle is on the Browse Screen where ThisItem.’Pet Type’ has become invalid. Choices are effectively small tables. So, by simply referencing the table the app does not have enough information to know which field to pull through. To fix this we must specify that what we want is the value of the choice. Therefore, ThisItem.’Pet Type’.Value will give the app enough information to pull the correct information.

    Step 4 – Inserting a Dropdown

  • Head over to the edit screen
  • Select the “Pet Type” card
  • On the right-hand side of the screen, press Advanced, then hit unlock.
  • Now delete the text input box
  • Insert a Dropdown and resize as necessary
  • Step 5 – Getting the Correct Fields

  • The Dropdown will come built in with the Power apps default DropDownSample
  • To change this, we will need to go to the “Items” property for the Dropdown and enter the following:
    Choices([@pet_data].’Pet Type’)
  • Now you should have a working dropdown.
  • Next Steps

    Having now created a dropdown from a choices column, have a play with the properties and design of the dropdown so you become familiar with it. Ready for a challenge? Create yourself a People picker dropdown.

    Trusted by Leading Brands

    “We work with organisations across many sectors of different shapes and sizes from 10 to 100,000 employees.”

    Contact Form

    Contact our team today!

    Talk to our team

    Contact Us

    Topics
    Share this

    Related reading

    NewsMicrosoft 365

    Dynamics 365 vs Model Driven Power Apps

    Explore how SMEs can use Microsoft Model-Driven Apps to create affordable, custom CRM-like systems. Learn how to manage customer data, track sales, automate tasks, and access powerful reporting—without the high cost of Dynamics 365.

    22 January 2025

    NewsPowerApps

    Power Apps vs. Power Automate

    Explore the differences between Power Apps and Power Automate and learn how combining them can deliver powerful, low-code solutions for businesses. Discover how these tools work together to streamline processes and improve efficiency.

    21 January 2025

    NewsPowerApps

    Using The UpdateContext Function In Power Apps

    Discover how to efficiently use the UpdateContext function in Power Apps to manage context variables, optimise memory usage, and enhance app performance. Learn best practices and practical examples for Canvas Apps.

    21 January 2025